Showing posts with label bathroom. Show all posts

8.18.2011

Welcome back... to my getting-better disaster

0 comments
Hi folks! 

Sorry I had this on hold for so long, but I just couldn't bear to keep taking pictures, or to keep reporting that the bathroom just wasn't coming along as fast as we hoped.  Here's where we are!

This is where we left off.
Since then:
We drained the pool and it filled back in...

Hubs built a wall...
I helped. A lot.
I measured and marked.
I cut.  (Pardon the crazy angles... Lil C actually took these!! I love that I have an entire sequence of every move I made from setting the board down to walking away with it!) 
Hubs continued to build.
Lil C continued to play and be adorable, as always.
The baby bird hatched.  Then we moved the nest.  Mama Bird found him just fine.  Then he fell out onto Lil C's play structure platform and died. So sad. 
Then I threw the Biggest. Hissy Fit. Ever.  So we bought a cheap camper so I could have running water and a stove to cook on.
Hubs installed a PEX water supply manifold and spent a couple weeks routing all the lines....
Then we invited the plumbing inspector out and he gave us a passing grade:
You should have HEARD this guy go on and ON about how Hubs did a good job!  Makes us wonder who the  heck the poor guy works with all day!
And finally, after 6 weeks of miserable lack of facilities within the house, we now have a working toilet AND shower!
Hey look!!! There's a wall, and a toilet, and a tub/shower, and running water, and working drains, and connections for  all the other stuff we'll put in someday... like another toilet, and a shower, and a vanity in Lil C's bath and double sinks in ours...
Boring words and no pictures to follow in tomorrow's post!  Thanks for reading!

5.29.2011

Plans, The Pool, The Cat, and The Dog

1 comments
Well, I'll tell you about the cat and the dog first.  Hubs pulled a dead rodent out of the pool a few days ago and left it poolside.  Big mistake with our dog who likes to roll on dead things.  The poor dog has been banished to the backyard for two days now - until our groomer opens up after the holiday weekend!

Then, Hubs and I were sitting in the living room at 1pm on Saturday afternoon of a long weekend, working on plumbing plans, and we heard a cat fight RIGHT outside our front window.  We DO allow our cat to go outside, so Hubs pretty much tackled me to get outside and make sure our cat was okay.  Turns out, she was bleeding small drips from the bum area, and she wouldn't let him get a good enough look to see how serious it was.  I scrambled to get the cat carrier, while Hubs corralled her and TRIED to look at her wound, then gave up and comforted her.  After she (and her bleeding bum) were contained, I called my vet.  No answer - it was after-hours already.  Of COURSE!  So I scribbled down the emergency vet's number, called them up for directions and to let them know I was coming (and that it wasn't life-threatening), jumped in the car and drove off.  Then I got to the end of my street and realized I'd forgotten my cell phone.  So I had to go back for it.  Fast forward 3 hours, antibiotics, a shaved and washed bum, and $200 later, and you'll find the cat sleeping on the drive home, acting like nothing's wrong. When I got home, we settled her into the bathroom, where she'll be making her home for the next 10 days... yay for us.  :/

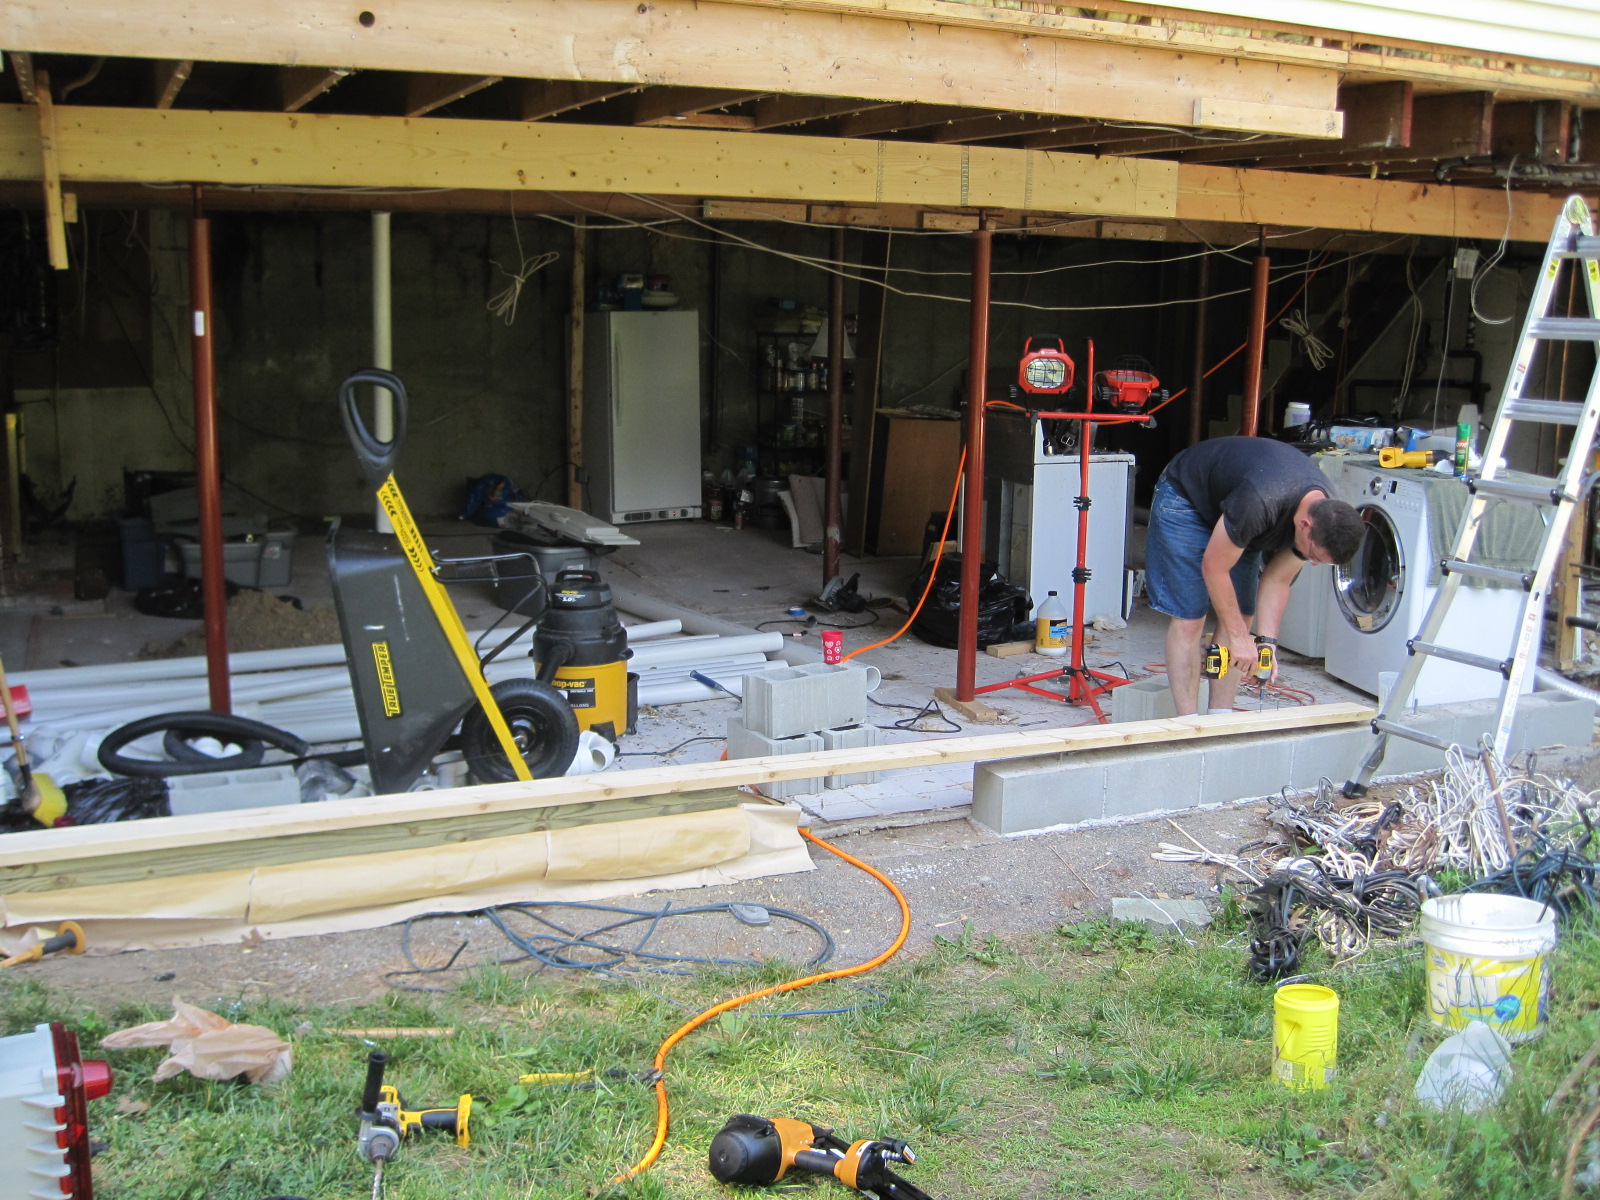
So, other than all THAT adventure, we haven't really DONE much the last couple days, due to the need to plan the plumbing in the ENTIRE HOUSE before proceeding on a single wall.  But I'm pleased to show our progress!  (And Hubs' awesome grid-paper magic!)
Plan for the entire basement layout!
The top is the front of the house - the front half is pretty much open, unplanned space at this point.  The only main features of that space will be the fireplace and the electrical panel on the left, and the stairway to the main level on the right.

Moving on to the bottom half - the leftmost feature is a walk-in food storage closet for me - plenty of shelves and space for my upright freezer!  Also, where Hubs has written "Backfiller" along this closet's wall - that's going to be a open-and-close-able  pass-through wall for proper food storage rotation!

The next space over will be open, with the door to the backyard just outside my food-storage closet.  Right along the midline, you can see that Hubs has sketched in some cabinetry.  The precise usage will be determined later - entertainment, or daycare, or ... yeah.  We don't know.  (Yes Mom, I hear you.  "Dehydrator space!  Bread machine! Sewing station!"  I'm also thinking this will make excellent storage for my less-frequently-used appliances.)

The next space will be a utility room - my washer and dryer will be on the other side of the wall behind the cabinetry.  Um, actually... *looks HARD at this drawing* Please ignore the layout of THIS bathroom design.  It's wrong.  It's not what we're doing.  But that's the bathroom area.  The NEXT picture will show you the final layout of that space.

Lastly, the space all the way on the right is the space under our den, and will be used as a mechanical room.  We are likely going to install a geothermal system, forced hot air, and an instant water heater in there.

Under the stairs to the main level we will have the well accumulator tank, the whole-house filter, and the water softener.

THIS is the bathroom layout!
The top of this picture is the mechanical room.  The right side is the external wall to the backyard.  The left side goes out right next to the empty space at the front of the basement, and the bottom backs up to the counter space.

My washer and dryer will have a built-in countertop running over the top of them!  The sink will be a utility/laundry sink.  Just to the left of the sink, we see the space under the stairs - where the water softener and filter will share the drain with the utility sink.

That big pipe-looking line that runs through the middle is just that - Hubs' plan for the drain lines.

Layout for the upstairs bathroom reno - turning 1 bath into 2!
Along the left side of this drawing is our upstairs hallway.  The topmost wall shown here borders the attic area above the den.  The right wall is exterior, and the bottom will open into our bedroom (there will likely be a door, even though there isn't one shown here).

The top bathroom will be Lil C's - simple, cheaper materials that get the job done and are easy to clean.

The other bathroom will be part of our new master suite.  The toilet will be under a window, the shower will be nearly 5 feet wide by 3 feet deep, and we will have nearly 6 feet of counter space to house our double sinks!  Our closet will run the 8-foot length between what is currently the first window in our bedroom, and the current bathroom window.  We'll use elegant tiles, pretty glass, a more expensive toilet, up-scale fixtures, and Hubs plans to put some homemade built-ins in the closets.  (As I type this, he has run off copies of these pages and is still working on the exact drain lines of all of these fixtures.....)


Lastly, I went outside a couple hours ago to snap a progress update picture on the pool draining, and.... well... our devil horns came out.....
At my urging, Hubs threw the dog into the pool - at the deep end!

He made a bee-line for the stairs, although he seemed to be enjoying himself.

So much so that he turned around, swam a circle, and THEN headed for the stairs.

Have you noticed the water quality or the level of the pool water at ALL yet???  Or are you too busy reading captions?
Then, for good measure, Hubs threw him in again.  This time, the poor dog just went straight for the stairs.  Apparently, once is fun, twice is mean?

4.22.2011

Progress & More Leaks

2 comments
Hello!

My apologies for missing yesterday - my computer REFUSED to play nicely with my camera card. And, really, what's a blog post without pictures??  So here's what we've done:
I started with a nice clean corner.  
Then Hubs ripped it out.  And the ceiling.
Which turned into this.
And then we cleaned it up to this.  And by "we", I totally mean "ME".
 Notice the stairs in the above photo.  That's the tippy tip of the basement stairs.
And speaking of the bottom of the stairs....
This is the wall at the bottom of the stairs, in front of them (north wall).  Check out how, top to bottom, we see drywall, studs and insulation, and then.... the concrete wall??  Wait, what?  The studs don't go all the way to to the ground!!  FAIL.   (No, that's not cuz Hubs ripped it out before I could take a pic.  That's how it was.)

Anyway, moving on...
The view while sitting on the stairs now, looking into the basement!
If you look closely, toward the very bottom of the picture, you can see where the studs were anchored into the concrete.  So that's where another wall used to be.  Now we can start moving everything to this north concrete wall area and start in on fixing The Termite Wall (in the southeast corner).

And, lastly:
Remember this?
And this?
Well, as soon as we could take showers again:
I found more of this. :(
So we went back upstairs to look at the wet wall (the wall that has all the plumbing for the shower in it):

And I graciously allowed Hubs to break our 1-floor-at-a-time rule so he could turn this:
Yeah, he totally busted out that tile before I could even get the camera!
Into this:

So we could see this:
BTW, that's not our towel.  It was IN THE WALL.  I can't make this sh*t up....
Then Hubs went around the wall and took off the tub spout, and determined that the problem was the overflow faceplate.  In the above photo, that's the back of that pipe with the towel.  On the photo below, that's the silver plate that we all see in our tubs.
Yeah, we're short 1 tub spout in this pic...
Ours isn't very pretty.  But behind it was way worse:
YUCK!!!!
But, clean it all off, realign it all, throw in a still-open wall, and a dash of awareness, and we're not TOO worried.
Hubs refuses to pose.  It's action shots or nothin'.
Another progress report tomorrow or Sunday (as Hubs works on Easter, anyway) on the basement and how we managed to completely fill the dumpster!

4.20.2011

A Peek Into a Renovation Marriage

0 comments
Pop Quiz:

In your marriage, whose job is it to buy the groceries?
Cook the food?
Mow the yard?
Shovel/snowblow?
Investigate bumps in the night?
Fix a leaky ANYthing?


Well, in MY marriage, the first three are mine, and the last three belong to Hubs.  But I find that whenever we start renovating, I start taking over more and more "manly" chores.  Like mowing the yard.  That started when we were in Charleston.  Renovating.  And he was too BUSY too be bothered with piddly things like mowing the jungle in our back yard.  If I wanted Lil C to play in the back yard, I was going to have to learn to start the mower all by myself.

Generally, the ENTIRE "fixing" category falls squarely on Hubs' (or should I start calling him Mr. FixIt???) shoulders.  Until today.  The Renovation Marriage mentality has started kicking in again..... I feel it.  A slow creeping of testosterone into my blood as I suddenly have the urge to feel empowered by using power tools, razor blades, utility gloves, hammers, and....well, I was going to say, and screwdrivers.  But I already use those.  "Replacing ALL household batteries" falls squarely onto MY shoulders, so I have confiscated and hidden 2 screwdrivers exclusively for my use.  (Hubs counted one time.  He has over 200 screwdrivers.  He won't miss the 2 I stole, I promise.)

Anyway, back to the story:

It all started with this:
A nearly-invisible puddle of water on the kitchen floor.
 Which led to my mentioning it to Mr. FixIt - Honey, we have mysterious puddles forming on the kitchen floor.  So he made a small 1" round hole in the ceiling one night to see if there was any water directly above Said Mysterious Puddles.  (By the way, my in-home geography SUCKS.  The bathtub is DIRECTLY above this spot.)
See the hole?

Then I SAW the water drip... drip.... drip...ing onto the floor Sunday night while Hubs was showering.  So I told him about it again.  So he recaulked the tub as soon as I had finished cleaning up.  That started a no-showers-for-36-hours clock.

So we didn't shower at all on Monday - we held out till Tuesday morning.  Hubs took his morning shower around 05:30, and I took mine a couple hours later.  And when I did, I saw this:
36-hour-old caulk, already pulling away

36-hour-old caulk wrinkling up.
I didn't know what to think.  So I called the people who made the caulk we used, and described the problem.  I had barely described the problem however, when the nice man told me that we were most likely using latex caulk:
latex caulk = not right
 When we SHOULD be using silicone caulk:
silicone caulk = right
He said if silicone had EVER been used previously on the tub, that the latex wouldn't stick, and we'd end up with ribboning and pulling up, and lack of adhesion and a tub on our kitchen table.  Ok, so that last one was just me stating my worst fear and not what HE really said...  The simple fix he proposed was to go buy some silicone caulk and try that.

_____  _____  _____  _____  _____  _____  _____  _____  _____  _____  _____
Here begins The Renovation Marriage mentality kicking in (because, if you were taking notes, you'd remember that I DID say that HUBS recaulked it on Sunday):

Today, I got myself the caulk gun, some hair-dye gloves (yep, I did watch Hubs wipe caulk all over everything trying to get it off HIS bare hands), a couple razor blades, and the new tube of caulk.

Easier than playdough.
 I mean, like, seriously, the stuff wasn't even TACKY on the tub.


Once the easy stuff was off, the razor blade made short work of the rest of it.

Cut off the tip of the caulk.
I was sure to leave plenty of room for Hubs to have to cut it again later....cuz we all know caulk dries out and it's almost worth buying a new tube before using the three-quarters you already have, just so you don't have to mess with pulling out the dried-out plug.

For all the women who have never caulked.
There's a cute little stick on the end of caulk guns that have no apparent use.  This is that use.  I haven't seen an episode on "How It's Made: Tubes of Caulk", but somehow they actually manage to get FOIL inside, all the way down at the END of the long part.  So the stick punctures the foil, and life caulks on.

I didn't bother making it pretty.

In fact, it was QUITE ugly.

But when I used a gloved hand to smooth out the ugliness....
Hopefully all the puddles stop!

And we'll have a well-caulked tub.
....for a year.  Till we tear this ugly thing out and throw it carelessly in a dumpster and scream good riddance to it.  Because, really??  A SALMON-colored tub?????  But that's another post....  See you tomorrow!